Showing posts with label wintery. Show all posts

Thursday, April 12, 2012

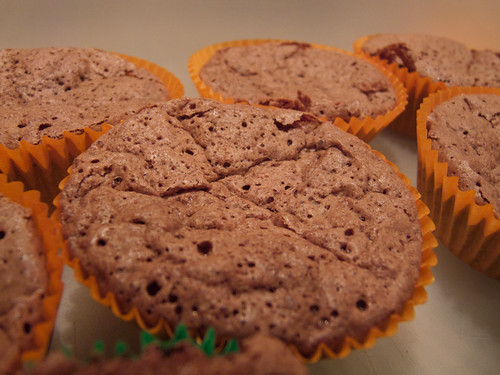
Flourless Chocolate and Hazelnut cupcakes

Sometimes a regular cupcake just won't do.  Sometime, you  need it to be more like a fancy chocolate, decadent, rich, moist and full of sinful pleasures from top to bottom.  Sometimes, you just need an excuse to make the most chocolatey gooey cupcakes.  This day came, when I decided to make a gluten free cupcake for a chocoholic friend.  What better excuse to make a flour-less cupcake?  

Flourless cakes are my favourite.  I can't go past a small slice of moist, dense cake.  Putting them into cupcake form was a great idea.  These cakes are not the kind of cakes you just keep on eating.  They are very rich!  I made them into fairy cake size, which is halfway between a mini cupcake/muffin size, and a "normal" cupcake (muffin) size.  I would say this is ideal, they are a decent hit of chocolatey goodness, and yet, you could probably have 2 and get away with it ;)  I will not judge you if you had to eat more than that! 

Don't be fooled by the light colour, under the delicate crust lies a dark, moist chocolate experience

Sunday, February 5, 2012

Apple berry oat crumble :)

This is an experiment to try making a somewhat healthy dessert, that's can still warm the cockles.  It was a total experiment, but I think it turned out well.  It was awesome served with some Greek yoghurt, but you could also use warm custard, cream, or even a nice vanilla ice cream! 

The berries released their delicious red juice into a lovely sauce, and dyed the apples bright red.  Unfortunately I didn't get a picture of the ready product, oops! :)
Just as I put it in the oven, when cooked it turns into a golden crunchy oaty topping with a delicious saucy red base :)
Filling
2 Granny smith apples
1 cup mixed blueberries and raspberries (I used frozen, use fresh if in season and available)
1 tablespoon sugar
1/4 teaspoon cinnamon

Crumble topping
2 tablespoons butter (I used "can't believe it's not")
a cup or so of quick cook oats
1 tablespoon dark brown sugar
1/4 teaspoon cinnamon

Peel, core and slice the apples finely and place in a pie dish
Throw the berries and sprinkle the sugar and cinnamon on top, and mix until evenly spread around. 

To make the "crumble", melt the butter and then add the sugar, oats and cinnamon.   Sprinkle/spread on top of the fruit and bake until the fruit is cooked and the top is lovely and brown.  Mine took about 25 minutes in a hot (200C) oven.  Let sit for a few minutes before serving.

Enjoy!

Thursday, February 2, 2012

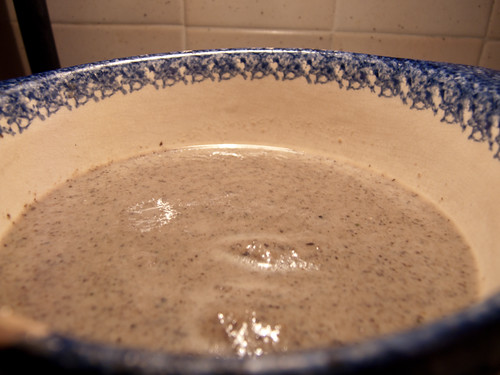
Mushroom mushroom soup :)

This soup is so mushroomy, I had to put it in the title twice! :D

so tasty, and SO ridiculously simple and quick!
I'm always on the look out for recipes that I don't need to plan ahead for.  I love cooking things that take lots of time, but I also work a 9-5 job, and sometimes, I just don't have the time or inclination to plan ahead.  This means that I either end up eating at 930pm sometimes, or I need to find things that don't take long to cook. 

Enter - the humble mushroom!  Mushrooms cook in a jiffy, are available ALWAYS (but especially in the colder months, when they thrive, even outdoors!) and can be made into so many different things.  I love a soup that's fast to make too, because all my favourite ones apart from this one actually take a while. 

Additionally, I've just started a Weight watcher's diet, so am trying to adapt recipes to fit into my daily allowance.  Essentially, I'm still eating low carb (although I'm allowed to have carbs on this diet), but now with additional low fat! 

This soup can be adapted to be as creamy and decadent, or as low fat as you like.  Really though, the low fat version doesn't taste all that different!  I'll give you the recipe for the low fat one, and will comment in the actual method of how to make it just a little extra decadent and rich, ideal for a soup starter for a wintry dinner party. 

You will need a blender (either immersion or stand alone) for this soup.  I've never tried it without blending it, but I'm sure it'll taste great too! Just slice the mushrooms a little neater if you are planning not to blend it :) 

Qaqocc Mimli (Stuffed steamed Globe Artichokes)

The start of the Artichoke season to me means a few things (apart form deliciousness!)

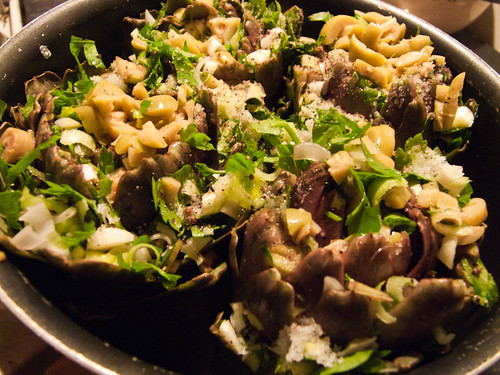
Ready stuffed and packed tightly into the pan for cooking

1) The start of the really cold part of winter
2) Those brilliantly sunny but crisp cold days of January (hiking!)
3) The urge to squirrel away these delicacies to bring them out at the height of summer.
4) The excitement I feel when the farmers leave a field of them to flower so that they can use the seeds for next year.  Anyone lucky enough to have seen these fields, they are simply spectacular. The flower grows to be the side of your head, and when they are in bloom, you really see the fact that they are, in fact, a thistle!

What we call the "choke" in an artichoke is in fact the hairy mass of immature petals that would otherwise bloom to become that purple mass in a mature flower.  In culinary terms, the globe artichoke is the bud, which is edible just as it's been formed, and before it starts opening up to bloom.

Here in Malta, they are a seasonal delicacy, even though you can prepare them (and I will let you know how in a later post!) to freeze and store for later on in the year.  Currently, the price is still "high" as it's right at the start of the season, but in a few weeks, we'll be buying a box load for summer use :)

The preparation of artichokes starts from the selection;
They need to be as tightly closed as possible (especially the inner leaves). 
Firm to the touch and feel heavy. 
They need to be as round as possible, not tapering to a point at the top. 
Ideally, choose them from a Green grocer who keeps them on the full stalk, and only ask him to trim it down to 10cm if you are using them on the day. 
If you plan to use them the day after, keep them on the stalk as long as possible, and you can even do as I do and chuck em in a vase as a decoration until you need to use them (keep them only a couple of days though)

This recipe is based on the typical Maltese way of stuffing artichokes.  There are many variations, and this is most certainly not completely traditional.  I made do with the breadcrumbs, mostly because i didn't have any bread in the house, however they do keep the stuffing lovely and absorb much of the delicious, delicious liquid.  if you choose to add them, just crumble up some day old Maltese bread (or a good firm sour dough if unavailable), and soak with a splash of vinegar (the vinegar i added to the recipe anyway and mixed with the other ingredients.  Then add the rest of the stuffing ingredients to that. 

The method below is actually completely vegan (as long as you don't serve it with tuna hahah)  Bonus!

Many other Maltese recipes call for Tuna.  I like to serve my tuna on the side.  But really, the tuna is lovely when added to the filling too.  next time i'm making these, i'll chop a few anchovies into the stuffing.  I think it will be delicious!

Friday, December 30, 2011

Easy peasy Cinnamon scrolls (yeast free!)

As you might know by reading this blog, I LOVE to cook.  I have no problems making things from scratch, taking the long way round so to speak, but sometimes, when there's an easier and faster way to get things into people's bellies and it works just as well, I don't mind taking that option!

These cinnamon scrolls are a case in point :)  Delicious, buttery goodness that leave the most amazing smell in your kitchen when making.  I was preparing them for Christmas brunch with friends and i wanted to have as many things ready to go straight from fridge to oven to hungry friends bellies in as quick a time as possible.  

When trawling the net, I discovered that the vast majority of the recipes involved yeast. In fact, I had no idea you could really make them without it.  But then I stumbled upon a recipe that used a soda bread/scone type dough, and suddenly my mind was filled with the soft, warm, buttery goodness that i love about scones, in a scroll form filled to the brim with cinnamon sugar and the decision was made!  

I must say, I actually prefer these to the ones using yeast.  They really are something you eat straight out of the oven, just like you would with scones.  The yeast ones are something I would make to eat straight away and then also have leftover to munch on when cold.  But I knew these wouldn't last, if I know myself and my friends! heheheh :D Additionally, unless i've been baking all day, my kitchen is quite cool, so the yeast would have taken a bit longer to rise... and i'm impatient! :D

Photo by a friend Sarah :) taken about 2 seconds before half of these were already down people's gullets :D
Anyway, they were really lovely!  I'll definitely be making this recipe again!! 
Ingredients for 12 mini ones, or 6 larger ones:
For the dough:
2 cups cake "00" flour (plain flour is fine too!) ***
2 1/2 teaspoons baking powder
1/2 teaspoon salt
100g butter, unsalted, chopped
2/3 cup of milk

**If you have self-raising flour, use that, and omit the baking powder, and use only a pinch of salt.

For the filling:
120g butter, softened
4 tablespoons lightly packed soft brown sugar (i used light, but dark would be find too!)
1 heaped teaspoon cinnamon

Preheat oven to 190 degrees 

First, make the filling:
Put all ingredients into a small bowl and beat with a hand held electric mixer until the mixture is light and fluffy :)  Set aside.

Sift flour, baking powder and salt in to a large bowl, then add the chunks of butter, rubbing it into the flour with your fingertips.  Keep doing this until the mixture resembles fine breadcrumbs. 

Make a well in the centre of this mix and add most of the milk (leave a couple of tablespoons).  Mix lightly using a flat bladed knife (i used my cake icing spatula) until it comes together to a soft, light, slightly sticky dough (add the rest of the milk if necessary).

Turn the dough out onto a lightly floured surface and knead lightly and briefly until the dough is smooth.  

Roll out the dough into a rectangle, 25cm wide and as long as it comes (around 40cm in my case).  Roll it to around 1/2 cm thick.  

Using a long flat blade knife (like a cake icing spatula or a butterknife if you don't have), spread the mixture evenly over the dough, making sure you go right up to the edges.  

Roll up the dough (from the long side) to make a long sausage.  Wrap in cling and put it in the fridge to cool for about 20 minutes (this isn't necessary, but it makes cutting easier and more even).  You can also store it like this for up to a few days, ready to be whipped out, baked and served!

Take out of the fridge, and slice the sausage into 2-3cm slices (or simply slice into 6 equal slices for 6 larger ones). 

Place on a baking sheet lined with baking paper, cut side up.  Leave some space for them to spread and rise, they grow quite considerably in the oven!

Bake for 12-15 minutes (a little longer for the large ones) until they have risen well and are lightly golden.

If you want, you can also make an icing glaze, but to be honest, when just out of the oven, there is really no need! 

For a cinnamon icing glaze, mix 1 cup of sifted icing sugar, 1 scant teaspoon of cinnamon and 1 tablespoon of boiling water until smooth.  Drizzle this over the scrolls with a teaspoon.  

Unlike the yeast ones, I don't think these would be great the next day.   But seriously, the are so morish that this won't be an issue.

ENJOY! :D

Tuesday, December 13, 2011

Roast Chicken with sage/onion stuffing

I love a roast chicken! :)  It's pretty easy to make, and makes the house smell so delicious :)  Ate a lovely roast chicken made by my brother in law, who adds plenty of good butter, and lovingly bastes it with juices all throughout the cooking time. Thought I'd try and recreate the juiciness in my own roast chicken, and it was a success!

I also found sage, so thought i'd try making my own stuffing.  Not a fan of meat in stuffing, but thought a sage/onion/breadcrumb stuffing without adding the bacon/pork meat would be nice :) I'd never tried this, but would like to think that it'll absorb all the inner chicken juices, and keep everything nice and moist while adding the lovely flavour of sage to the chicken :)

Here goes:

One free range chicken (i got a 1.6kg one, make sure you keep a note of how much it weighs for cooking time!)
2 large onions
garlic, chopped
a bunch of sage, chopped finely
butter (i used salted President butter)
a couple of slices of white bread (stale or dried in the oven then whizzed into crumbs)
salt and pepper
1 free range egg
optional: a teaspoon of mustard (i used English), a couple of teaspoons of redcurrant jam
a dash of white wine

Preheat the oven to 180C and place the top rack right in the middle of the oven.  you can use the bottom rack right at the bottom to make veggies (or simply chuck them in the roasting pan with the chicken if you want)

To make the stuffing:
Dice one of the onions, and fry gently with the garlic in some butter until golden.  Once ready, add to a medium size mixing bowl.  Add sage, breadcrumbs, salt, pepper, mustard and jam (if using), mix well, then add egg and mix again.

Chicken roasting:
Slice the other onion thinly, and place on the bottom of the dish you'll be using to roast the chicken.
Loosen the skin on the breast of the chicken, enough to be able to put your hand in.  place thin slices of butter in between the skin and the breast.  This will make for lovely moist white meat if cooked well (and by well i don't mean over done, but just the right time).
Stuff the chicken cavity with the mixture (don't over stuff, if theres any stuffing leftover, shape into balls and place them alongside the chicken, and place breast up into the dish. brush lightly with oil.
add a tiny dash of white wine to the dish.
Chuck in oven.
Cook for 20 minutes per 500 grams, plus 20 minutes.
It's important to baste the chicken every now and then.  Makes all the difference !
Every 20 minutes or so, baste the chicken by spooning the juices over it.

Once you think it's done, prick into the thickest part of the thigh, if the juices run clear, it's cooked.  If not, pop into the oven for another 10 minutes and try again.

Once it's done, take it out of the oven,  cover loosely with foil and rest for about 20-30 minutes.  You could ignore this step, and eat it right away, but apart from burning your tongue and finding it hard to carve, the meat will be dryer and less tender.  It really does make a huge difference, resting allows the meat to reabsorb juices into the centre, and relax. 

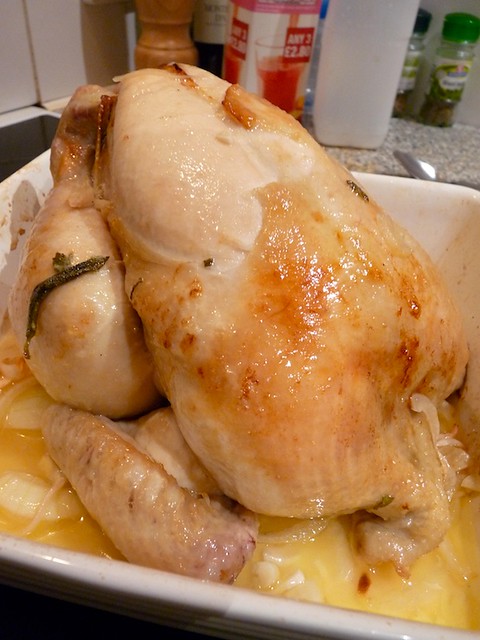
Mobile phone photo, the only one that got all the roast and stuffing :)


enjoy!!

Roast butternut and potatoes

This is a perfect side dish for roast meats.  also a perfect weekday dinner if you just add some other veggies into the mix :)

I've discovered that the smaller the butter nut, the better it is for roasting.  It keeps its shape, and is lovely and soft, sweet and nutty on the inside.  The larger it is, the stringier it gets (so I would keep the larger ones for soups).  Also, I always like to make a little extra, to use in salads or just to nibble on the next day, or if there's lots, it's great to make roast pumpkin soup!.  so delicious!


Honey Roasted Pumpkin soup with Indian Spices

So a lovely friend of mine works as a flight attendant, meaning she's a super jet-setter. She gets to go to all these interesting places for a few days :)  Last time she flew to Mumbai, and asked if i wanted some nice fresh Indian spices.  Sure enough, I was excited to get a couple of spices, but not as excited as I was when i actually saw what she brought, which was a whole bag of stuff!!!

Now that the weather has cooled enough for me to handle being in the kitchen, I decided that it was butter-nut pumpkin soup time!  The reason i use butter-nut is because frankly, i prefer it.  It's easier to cut, it keeps its shape when roasting, melts smoothly into soups without going stringy, and the taste - so sweet, nutty, delicious!

1 medium butternut (i would say about 1-1.5kg) peeled, seeded, chopped into smallish cubes (1.5-2cm)
1 large onion, diced
1 carrot, diced
one potato, peeled, diced. 
If in malta, some "karfus" (aka Maltese celery). If overseas, a celery stem, chopped finely.
some chicken stock (probably about a litre?) (Use veg stock if you please, and to make this dish completely vegetarian)
Goda Masala (or some curry powder, or some cumin, or whatever spice mix you would like to use.  I normally use just cumin, but this time, i decided on the Goda Masala, having never used it, but it said it goes really well with veggie curries, in fact, specifically, pumpkin curry!) More info below
Turmeric
Honey
Salt, pepper.
Vegetable oil
Fresh cream (or coconut cream if you want it to be vegan!), to serve

Spread chopped pumpkin in a baking dish, toss with oil, drizzle some honey, salt and pepper and cover tightly with foil.  Place in hot oven until the pumpkin is cooked (about 30 minutes).  Remove foil, toss a little, and return to oven to get some nice burnt bits going.  Burnt bits = more caramelly nutty flavour in soup :)

In the meantime, place onion, carrot and celery into pot with a little oil, and sweat for a few minutes (sautee with lid on).  Add spices (i used about 2 teaspoons goda masala, and about a teaspoon of turmeric), stir in chopped potato, add some stock - not too much, 2 or 3 cups should be fine, simmer until potato is cooked and kitchen is smelling of spicy goodness.

Once the pumpkin is done, throw it in the pot, simmer for 5 minutes and turn off the heat.  Let cool a little before blending.**

Blend until completely, velvety smooth.  Add cream to taste, and season if necessary.  Stir around with the ladle until the cream is completely blended in. 

Serve with an extra dollop of cream, and some freshly chopped spring onions/chives if you have any at hand. 

I like to serve this into a giant mug,  sipping and spooning it into my mouth, while siting by the heater  watching Christmas cooking shows :)

**I have learned the hard way why soups that require blending always have the "allow to cool a little" thing  before blending the hard way.  when blending, it releases lots of steam.  in a blender, this means a little explosion of burning hot liquid from the top.  In the pot, this means that IF some splashes on you, you be BURNED! ehe. 

Goda Masala is a dark powder spice mix - it's got a smoky and sweet aroma, and makes things spicy without being hot.  I've never seen it anywhere before, so i have no idea if you can get it.  I would try Indian foodshops if you have access to them.  More info here: http://madteaparty.wordpress.com/2007/06/15/goda-masala/.
However, the actual spices in this soup isn't the important thing, as long as you have something on hand.  I've made it with just a bit of curry powder, or even just cumin and turmeric, with some freshly grated ginger added in.

Saturday, April 23, 2011

Roast Potatoes - Hasselback stylez

Cooking potatoes in this way is a real win/win situation.  They take less time to cook than just placing a whole potato in the oven, and they also look really, really pretty!  Plus you get a little bit of the soft delicious inside, and a crunchy layer on every bite!

They are great served with something saucy, or really, whenever you feel like a roasted potato without waiting for ages!  Hasselbacks are not a hassle at all hehee :) 

There are heaps of variations, you can put various herbs, or even a little bit of grated parmesan to add extra crunch, or simply seasalt and ground pepper... it's great!

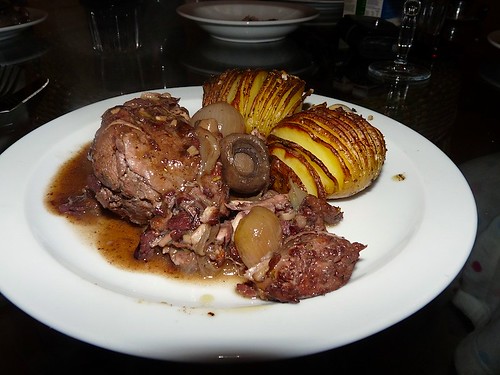
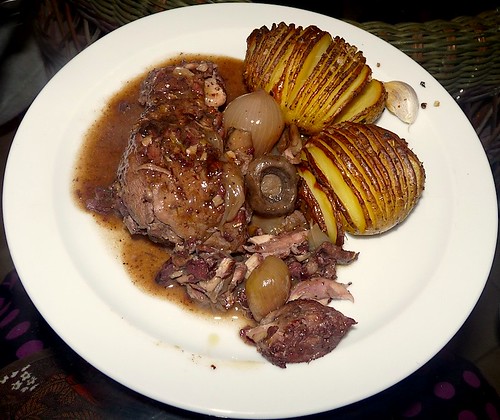
Hasslback potatoes with coq au vin


Regarding the type of potatoes, I like to use a waxy one, as they will keep their shape, yet remain lovely and creamy on the inside.  I find that using Charlotte,king edward or nicola is great, but in Malta, they don't come by "name" so just get the ones with the pink eyes, or the ones that are longish (rather than round) and yellow, not white on the inside. 
Ingredients for 4 people
  • 8-12 medium sized roasting potatoes
  • Chunky and fine sea salt
  • Fresh black pepper
  • Rosemary, thyme, or herbes de Provence
  • Olive oil
  • Cold butter (optional)
  • A head of garlic, separated into cloves but left unpeeled and whole

Preheat oven to 200 celcius (i think that's about 450 fahrenheit)
Wash and scrub potatoes, removing all the little eyes and bad bits.

Grab a potato, place it on the flattish side down (there is always a flatter side on a potato).  Start slicing with a VERY sharp and thin knife to about 2/3 - 3/4 of the way down. Make about 15 of these slices into the potato.  Be really careful not to go all the way down, but don't freak out if it happens once or twice.  We're not perfect!  Repeat with all the potatoes.  

Put in a mixing bowl, and pour some olive oil over the potatoes, and toss until they are all covered.  Don't be scared to use your hands at this point.  Just make sure that you have all the other ingredients at hand first, otherwise there will be oily cupboards and jars to deal with!

Place the potatoes on a shallow baking tray (i use baking paper also).

One by one, gently and ever so slightly pry the slices open and try and sprinkle some chunky salt in there. This will keep the slices ever so slightly open also, and will help the herbs, pepper etc get into each slice.

Sprinkle with pepper, herbs, some more fine salt (it's very hard to put too much salt on a potato!), and if you want, place a teenzy slice of butter in one of the middle slices.
In the oven...
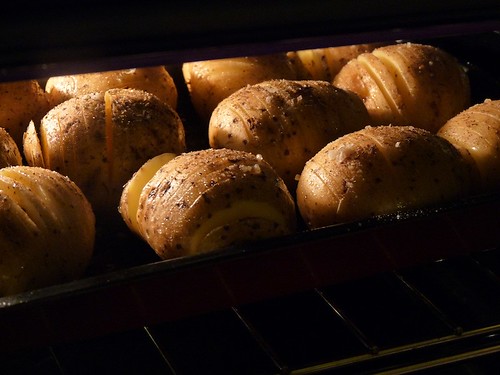
Put in oven, and leave for about 30-45 minutes, uncovered until they are cooked through and all browned and crispy on the top. 

Leave for about 5-10 min before tucking in, because they will be REALLY hot! :D  luckily you can "open them up" a little with your fork to let them cool faster :D  
They go very well with coq au vin gravy over them too :)

Tuesday, March 29, 2011

Coq au Vin

Ah.... this is one of my favourite dishes, to make, to serve and to eat.  Like the Maltese fenkata, this is a dish best served with loved ones!! :) I've adapted it to use things I can find in a regular butcher/supermarket/greengrocer.
It really makes a difference to cook this the night before, so try to do that if possible as the flavour really develops.  Plus it's way easier if you're entertaining anyway!  If not, try and make it as early on in the day as possible, and leave to sit for a couple of hours before reheating and serving!
Really good served with some kind of roast potatoes (i made hasselbacks, recipe to follow) and/or some fresh beautiful loaf of bread (luckily there's no short supply of that in Malta!)

Delicious and nutritious comfort food :)

Tuesday, November 23, 2010

baked potato gnocchi with mixed mushrooms

Jamie and I went to Amsterdam a few weeks ago, and rented a little apartment to stay in.  Great idea, as we could use ingredients we don't find so often in cooking :D

Headed off to the stoopermarket and found a variety of mushrooms, so thought we'd make something with them.  I really felt like potato something, and gnocchi sprung to mind <3

And so was the birth of the baked gnocchi mushroom dish :)
The finished product. melty, golden mushroomy potato goodness.

Sunday, November 21, 2010

Lala's lasagne

This recipe is pretty much my mum's recipe.. although we always manage to make it taste completely different.  To be honest mine tastes different every time. but i must say, I do like my own (and my family's) lasagne.  There are a few other people's lasagne dishes I've enjoyed, I can literally count them on 1 hand (my Uncle Kiki's, and my Aunt Isabel's, and my best friend's mum Pat).  I'm sure there are plenty of delicious lasagnas out there but i haven't had the pleasure, and frankly, I don't even really want to try cos there's not much I abhor tasting more than a bad lasagne. 

anyway here goes:

Wednesday, November 10, 2010

Spinach and Ricotta Canneloni

Canneloni is a baked pasta dish that i love doing, now that i've found how easy it is piping the filling into the pasta tubes, rather than trying to spoon it in :P  Love my practical mate and old housemate Becky, who walked past the kitchen once when I was making them and just said "why don't you use a bag to pipe it in?".... :D

Thursday, September 30, 2010

Mushroom risotto

I've totally got the risotto bug again... happens as soon as I make one, then i make one at least once a week, then summer rolls around, and i stop making it again...until the weather cools down slightly, then it's back to risotto time :D 


Tuesday, September 28, 2010

Roast Butternut pumpkin/squash risotto

This is one of my favourite dishes to make, especially when the weather starts getting shitty...And most people seem to love it also :)  bonus!
Photo by jamie aka http://backseatchef.wordpress.com/

Sunday, August 29, 2010

Ghagin Tork jew Griek ("turkish" or "greek" pasta, but it's actually Maltese!)

I have no clue as to whether this pasta sauce originates from Turkey, Greece, or anywhere else but Malta, but all I know is that it's absolutely divine, and So ridiculously easy.  You will need at 1.5-2 hours of simmering, so this is not something you make when you're starving after work :)

i love the simple look of this sauce, and the meat is literally melt in your mouth!

Pork Fillet - slow cooked

This is one of my favourite dishes to make and also eat.  It fills the house with the delicious smell of meat cooking in wine and garlic (similar to Maltese rabbit or Coq au vin), it's really easy, and is soooo so tasty!  I like to serve this in winter with pleny of mashed potatoes, with the winey garlicky gravy poured over it.

In summer, I just boil potatoes in salted water, and dress with some olive oil :)

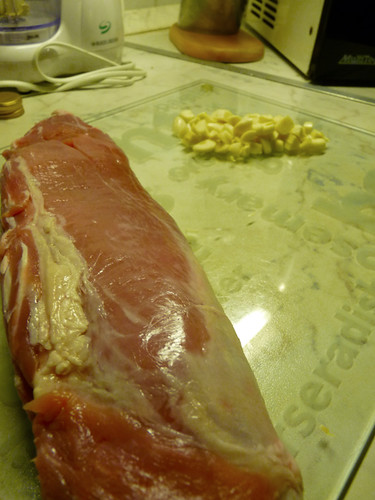
The most important thing to start off with here is a good quality Pork Fillet.  Make friends with your local butcher, even if it's the local supermarket butcher (for example, in Malta, Prime butchers are fantastic for pork products!).

remove the fatty sinewy bits for extra tenderness.

Friday, July 23, 2010

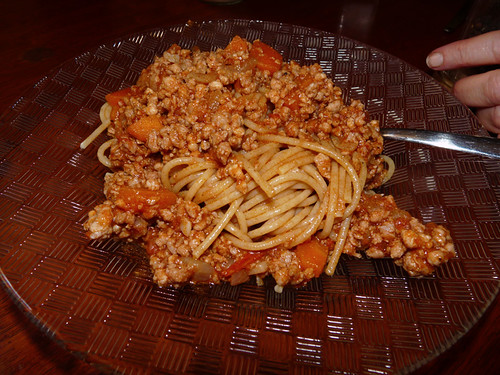
A bolognese/ragu based sauce for spaghetti (and baked rice the next day!)

Just like many people, bolognese sauce reminds me of being a kid, it's still the ultimate comfort food dinner for me. It instantly sends me back to being little, with my sister and 3 or 4 cousins, and mum and/or one of my aunts serving up steaming spaghetti loaded with sauce and cheese. Learning how to eat spaghetti with just a fork was like graduating, I remember the pride I felt when mum stopped cutting up the spaghetti because I'd learnt to twirl it deftly around my fork without dropping the pasta everywhere :)

Bolognese is also what started my cooking adventures apparently. At the age of 3, I was at my Aunt's house, and she was making bolognese. I looked at her in shock at one point, and started telling her that "my mummy makes it like this" and went on to explain what she was doing "wrong" and how she should make it. Needless to say she was very amused, and reminds me of this often hehehe...

The recipe I'm about to give is by no means a traditional bolognese. Apparently the original bolognese doesn't even have tomatoes or garlic in it, and uses heaps of milk and even funghi porcini! So I suppose a "ragu" or "meat based pasta sauce" is the better term.